Please note it is only possible to setup Azure storage in TimeTrak from version 4.1 onwards.
Login to your azure account at https://portal.azure.com
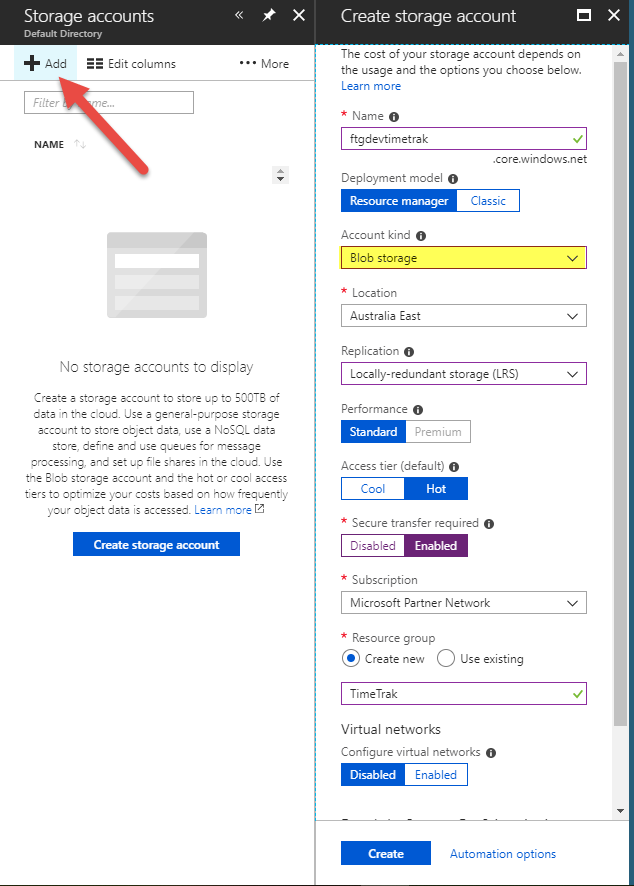
1. Select the Storage Accounts tab.

2. Click the Add button to add a new storage account (if you already have a storage account setup skip to step 4).
3. Fill out the form, selecting the settings that apply to your setup.
For TimeTrak, you need to make sure that you select Blob storage from the account kind field.
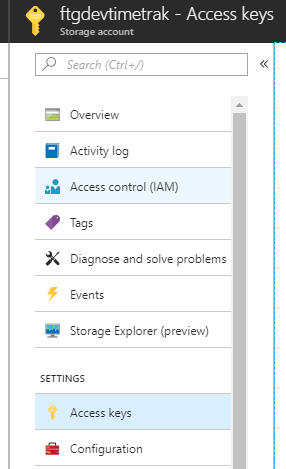
4. From the storage accounts tab select the newly created azure storage account, then click on Access keys from the settings.
5. In the global settings in the administrator console select the attachments tab and select Azure Storage from the Attachment Storage drop down field.
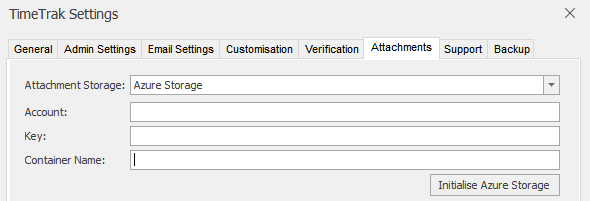
6. Enter in the account name that you used in step 3 to create the storage account.
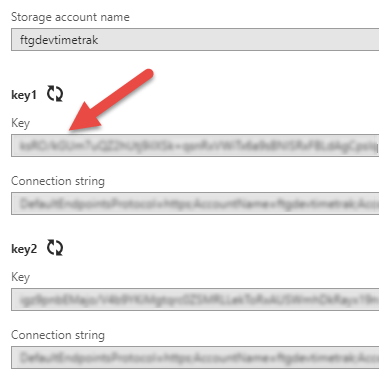
7. Enter in the account name and key from the screen in step 4.
8. Provide a container name. This needs to be a unique name that identifies this installation of TimeTrak. This name may only contain lowercase letters, numbers, and hyphens, and must begin with a letter or a number. Each hyphen must be preceded and followed by a non-hyphen character. The name must also be between 3 and 63 characters long.
9. Now click the Initialise Azure Storage button to setup the storage location for TimeTrak.