Whitepaper: TimeTrak Custom Fields
October 10, 2018 General,Whitepapers,
How to set up Custom Fields in TimeTrak
Many organisations use extra fields in their databases to capture information specific to their business needs. TimeTrak completely supports this functionality and extends it into custom fields in the TimeTrak database as well as the MYOB Exo database.
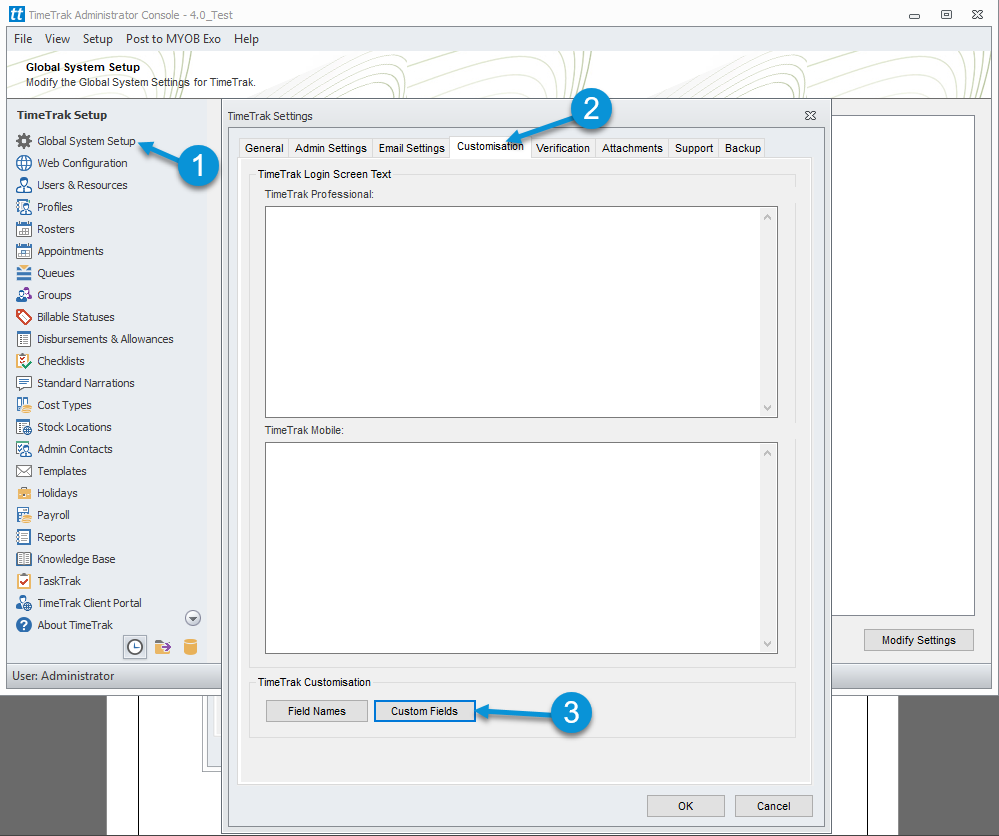
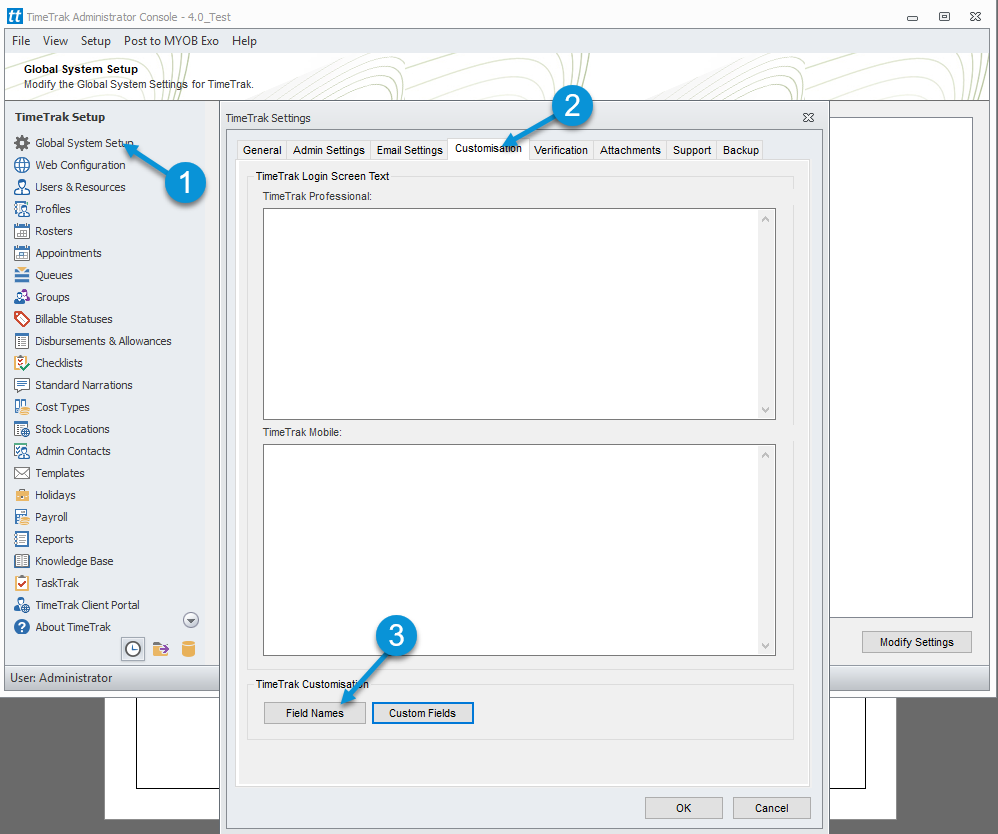
To set up Custom Fields in TimeTrak, log into the TimeTrak Admin Console.
Global System Setup Menu – > Modify Settings button
Click on the Customisation Tab
Click on the Custom Fields button
If there are out of the box fields in MYOB Exo that need to be visible in TimeTrak and are not, by default, a custom field can be added to show that field.
An extra field will need to already be in the tables at a database level for TimeTrak to be able to pick them up.
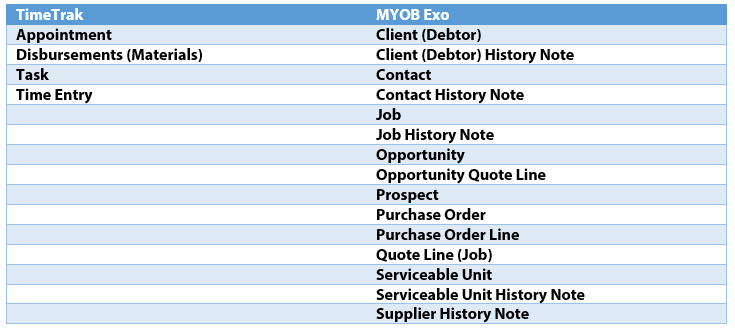
List of Tables from each database
How to set up a Custom Field
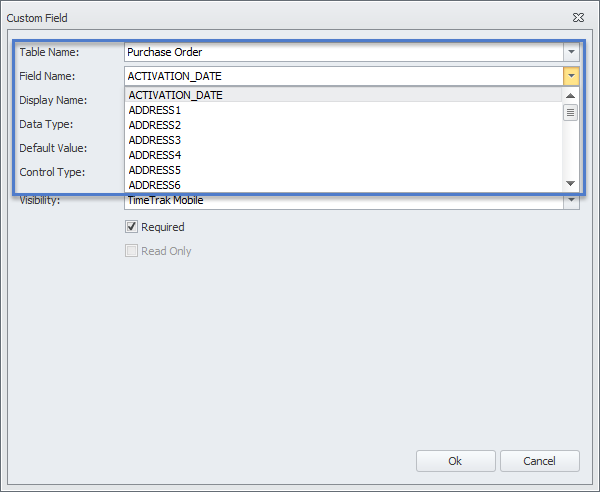
Choose the Table Name – it will either be a table in TimeTrak or MYOB Exo.
As soon as a table is selected, a list of fields, which TimeTrak does not display by default, becomes available.
Note: If the table is from the TimeTrak database, the field name must be defined at the database level. Examples of a TimeTrak table are time entries, appointments, or tasks. Please ask your TimeTrak consultant to setup the custom fields in the database and provide the field requirement and what you are trying to achieve in your support request.
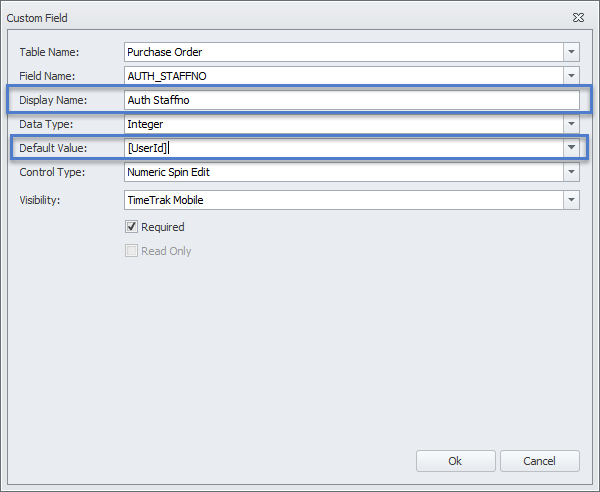
Select a field and TimeTrak will check what format is set up as in the database and pre-assign the Name, Data Type, Default Value and Control Type.
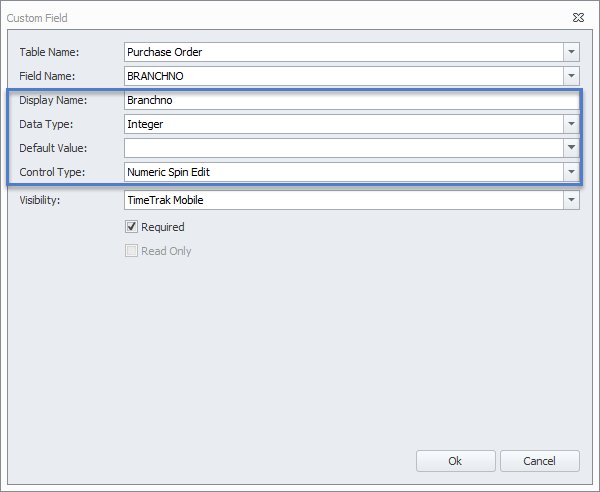
These can be altered if they are not correct.
The Display Name can be updated.
Options for Data Type:

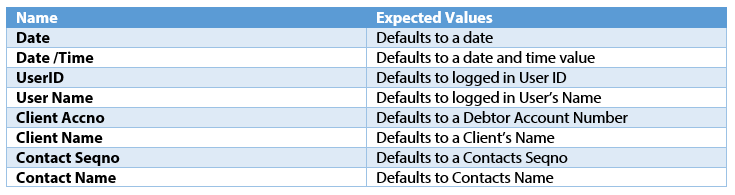
The Default Value can have a formatting rule applied to it.
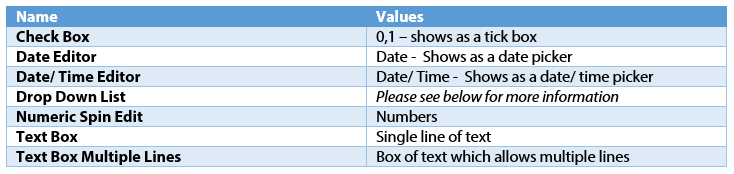
Options for Control Type:
Extra Functionality of a Drop Down List
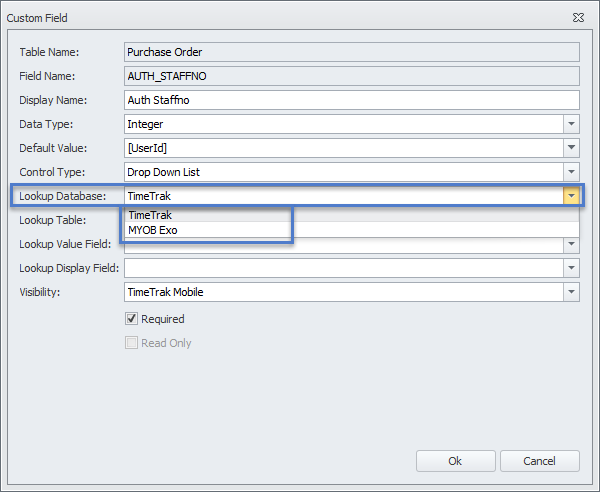
When a drop down list is chosen then an extra panel expands out.
The first thing to choose is which Lookup Database is to be used.
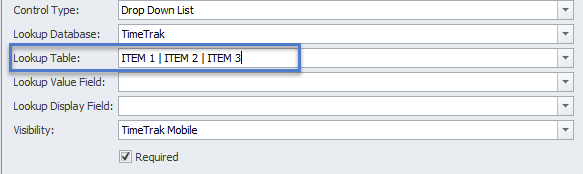
A Drop Down List can be a collection of set items separated out with a ”|” entered into the Lookup Table field. This will ignore the Lookup Database and just show the list.
Otherwise, select the database table, which links back to the first Field selected.
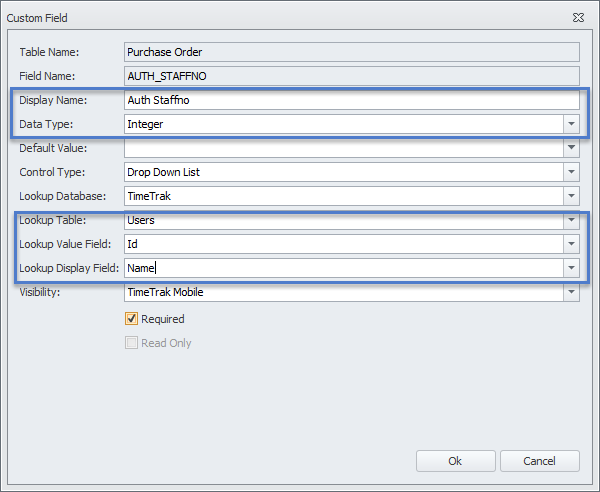
In this example, we have an Auth StaffNo for a Purchase Order, we want this to pick up the Job Cost Resource Number of TimeTrak User.
The Lookup Value Field needs to be the same Data Type as the first tables Data Type.
The Lookup Display Field can be another field, which makes it easier for the end user to select an item. For example, the ID matches the AuthStaffno but the user will see the Users.Name.
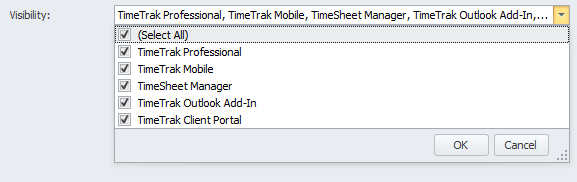
Set the Visibility of the Extra Field
Note all fields can be visible across all TimeTrak applications.
Choose if the field is to be Required, if it is Required then the user will have to enter a value into the field.
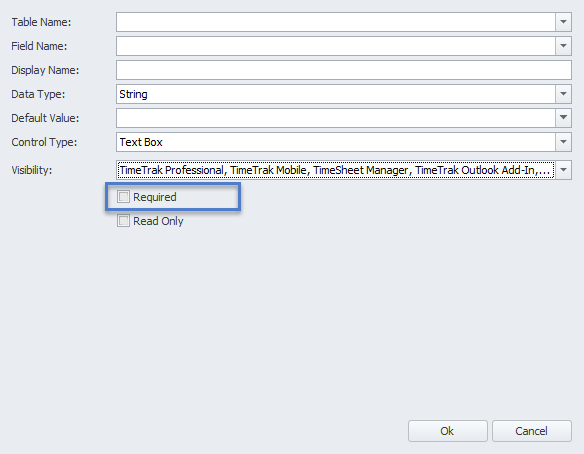
Choose if the field is to be Read Only, if it is Read Only then the user will not be able to edit the field.
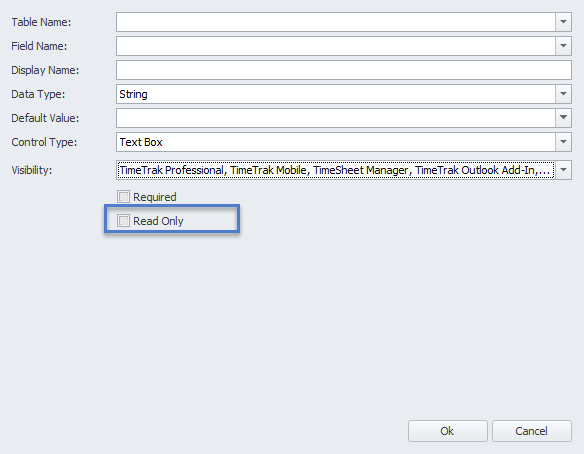
Note: “Required” and “Read Only” settings are mirrored from the data format in the database. If it’s not available to be “Required” or it cannot be rewritten, it will be shown in grey where you can’t change these settings.
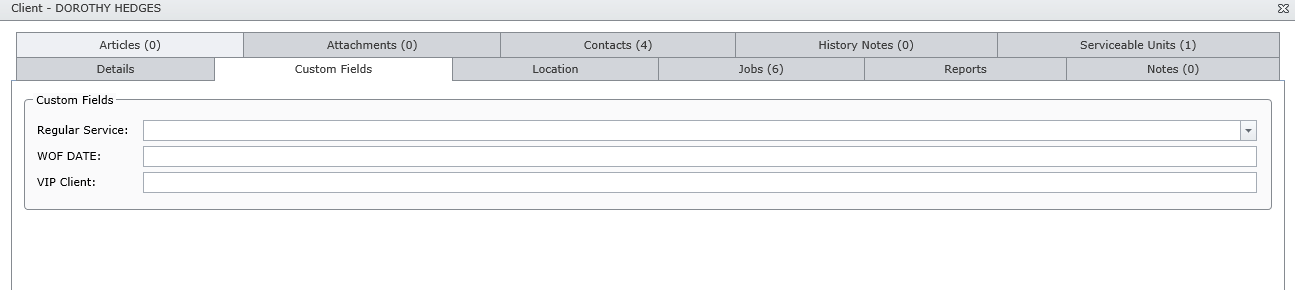
Once the custom fields have been set up in the TimeTrak Admin Console, then depending on the website you have allowed it to be visible in it will look similar to this:
TimeTrak Professional
TimeTrak Mobile

Populate the Field with SQL
Since the customisation field is created in the database, it is possible to use SQL query to populate the field with a different format or parameter.
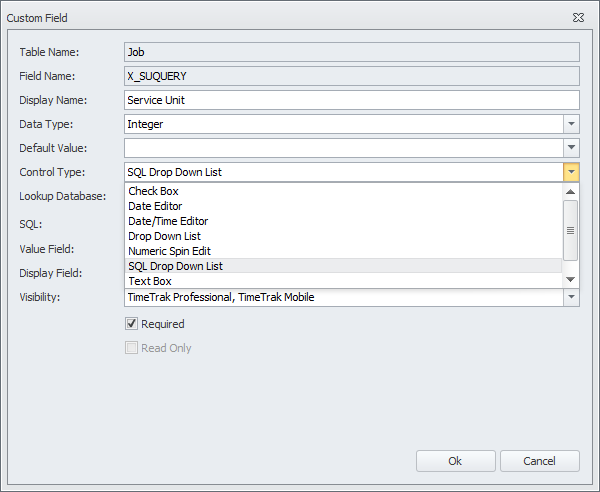
To use SQL query, choose SQL Drop Down List in control type.
From there, you can pass any query into the SQL field. There is a database symbol that you can check if the query is right or wrong and next to it, there are three dots where you can put a parameter to the query.
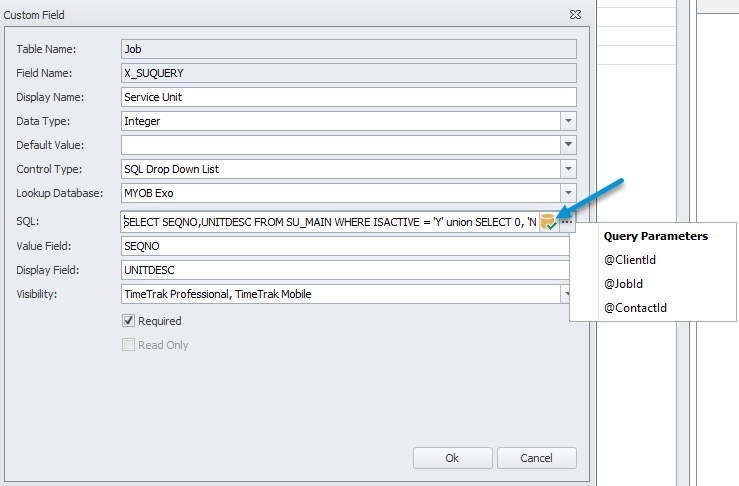
Note: In this SQL query field, you need to set the first column as the primary key to be used as key information for the table and the second column is the name, description, or any value that you want to be displayed in TimeTrak.
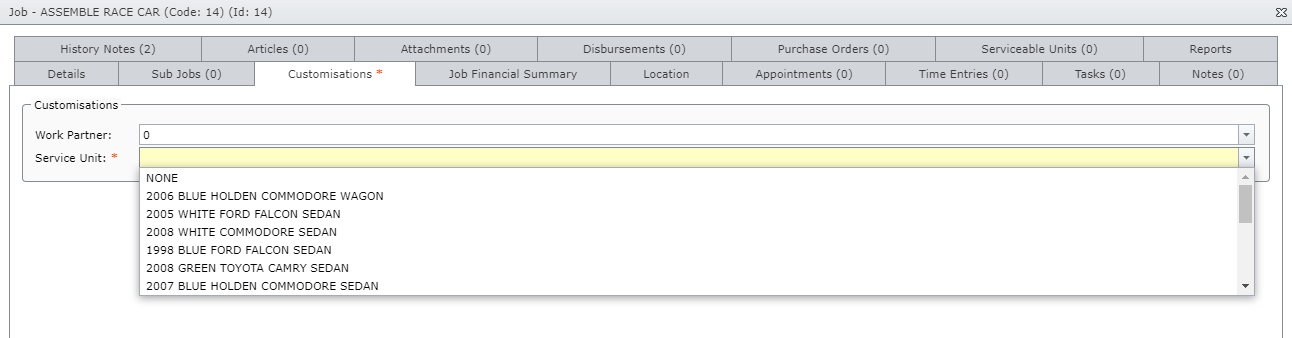
In the above example, there is a query to show active serviceable units with the query “SELECT SEQNO,UNITDESC FROM SU_MAIN WHERE ISACTIVE = ‘Y’ AND CUSTOMER_ACCNO=35 union SELECT 0,’NONE’ FROM SU_MAIN WHERE ISACTIVE = ‘Y’ AND CUSTOMER_ACCNO=35 order by SEQNO asc”
In TimeTrak, it will show the list of serviceable units for the user to select from:
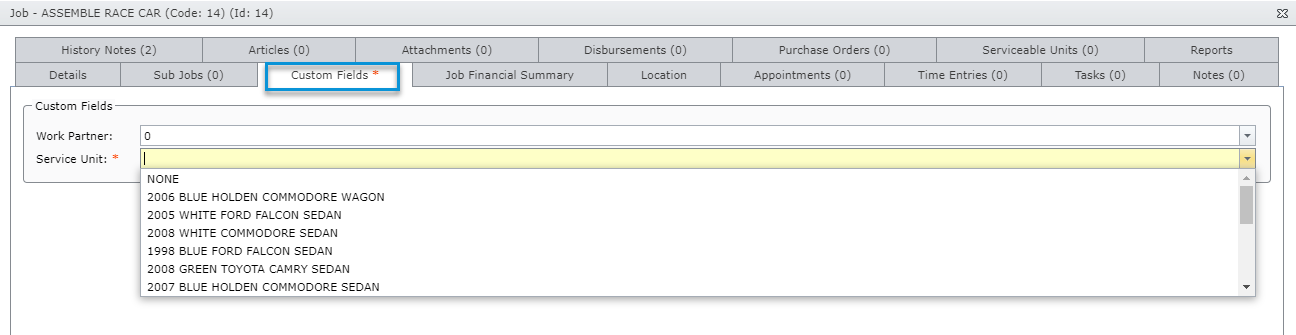
Change Custom Field Name
By default, TimeTrak calls extra fields “Custom Fields”. This naming is throughout TimeTrak applications and websites.
See below example of a “Custom Field”.
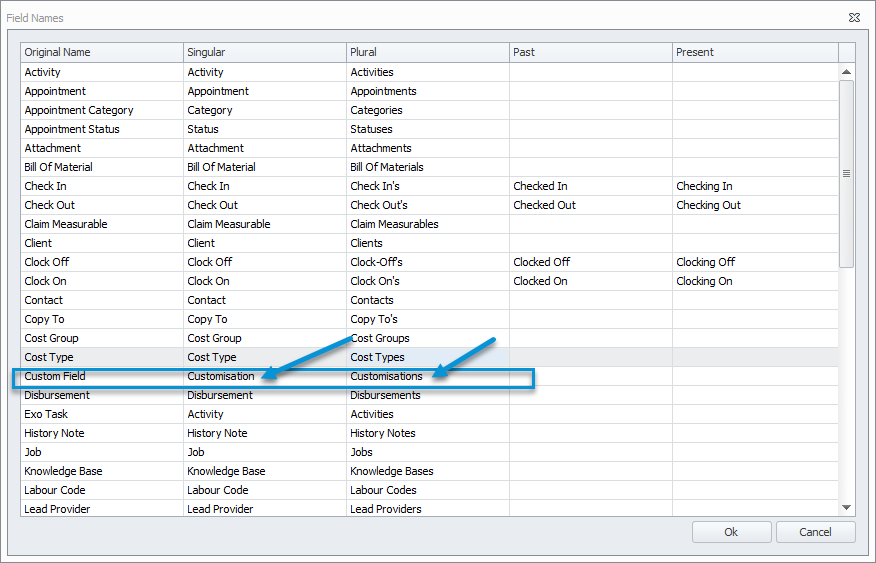
You can change this tab name in Admin Console in field names as per below
From there, change “Custom Field” singular and plural name into something that is more meaningful to your business and its processes and it will be changed in TimeTrak websites and applications.
Search
Categories
Tags
Latest Entries

Job Quote Line Narrations Displayed in TimeTrak APP
June 22, 2023
TimeTrak – Jobs
June 13, 2023
TimeTrak – Tasks
May 23, 2023
Disbursement description can now be edited within checklists in TimeTrak APP
April 30, 2024
Access TimeTrak data for reporting
April 24, 2024
CC and BCC in Scheduled Events
April 23, 2024

Increase and Decrease TimeTrak licensing from TimeTrak Professional
March 28, 2024
TimeTrak Newsletter – October2023
February 13, 2024